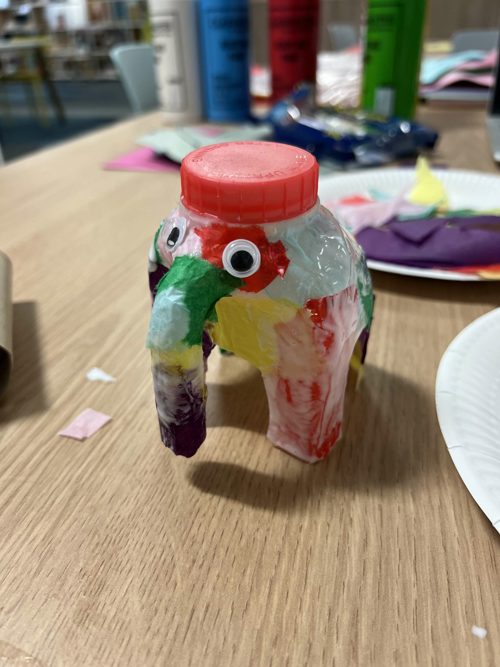
Milk Bottle Elephant
Published on 08/08/2025 in Blog
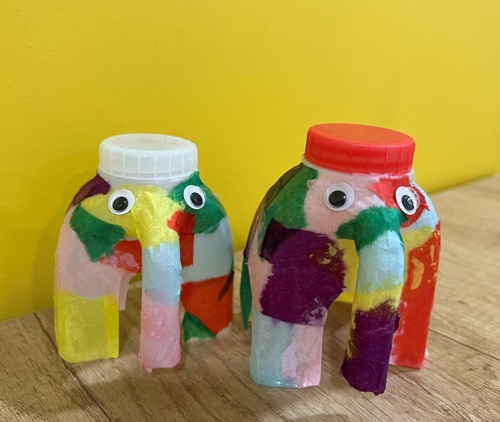
We’re excited to share another eco-friendly craft project to try with your children! This milk bottle elephant is a great activity to show your little ones how upcycling plastic waste can create something wonderful.
Whether you’re an educator, a parent, or a caregiver, this craft is the perfect opportunity to engage the early years in a fun and educational activity that will leave them with a sense of accomplishment and a trunkful of joy!
Follow the steps below to make a colourful milk bottle elephant!
What you’ll need:
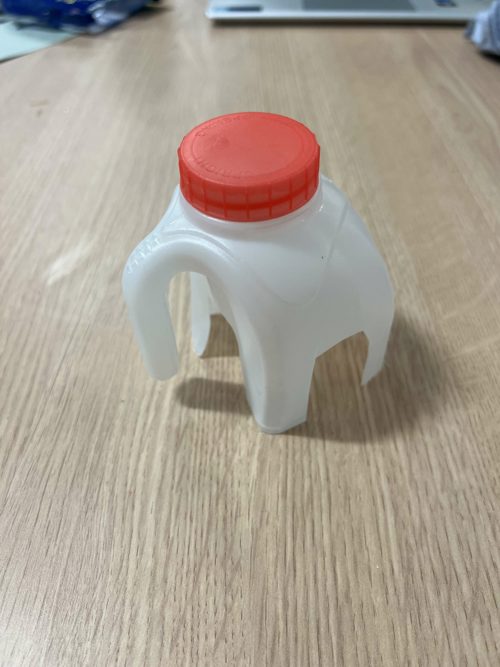
Empty milk carton
Step 1
Firstly, to make the elephant shape cut the milk bottle in half and the top section as the body.
Step 2
To create the trunk, cut around 2 centimetres from the handle so it’s slightly shorter then the rest of the carton. For the legs, cut an arch-shape on opposite sides of the bottle and a smaller one under the handle.
Step 3
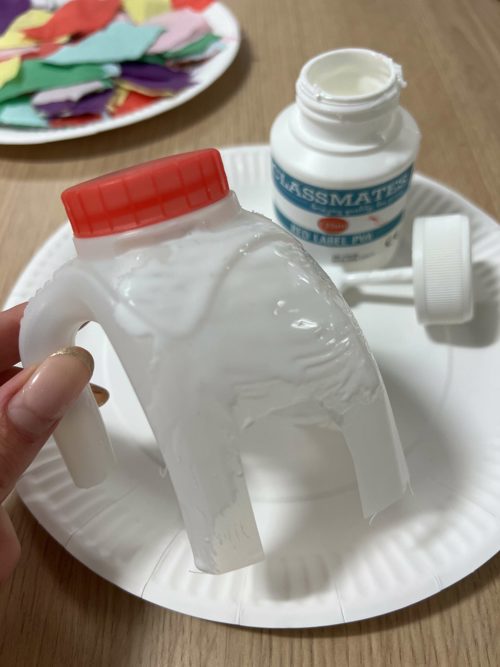
Next, using a paintbrush, cover your elephant in PVA glue.
Step 4
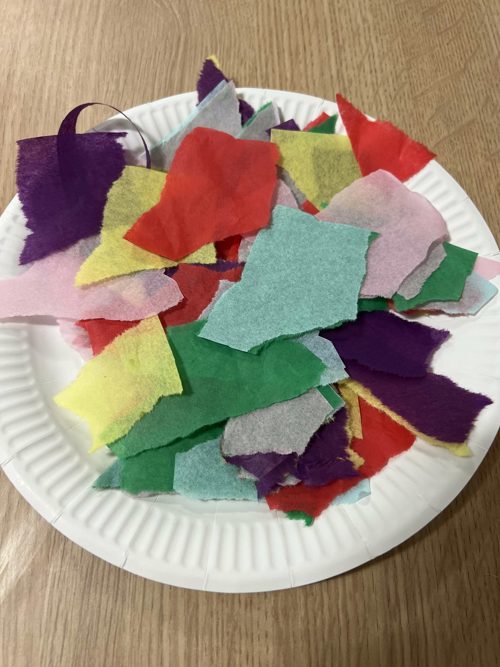
Cut or rip a variety of different coloured tissue paper and layer onto the glue-covered bottle.
Step 5
Add another layer of glue over the top and leave to dry.
Step 6
Finally, stick on some wiggly eyes between the trunk.
You can also add a LED light and turn your DIY elephant into a lantern! Make sure to tag us on Instagram to see your designs!
*Craft inspired by @sunhatsandwellieboots